|
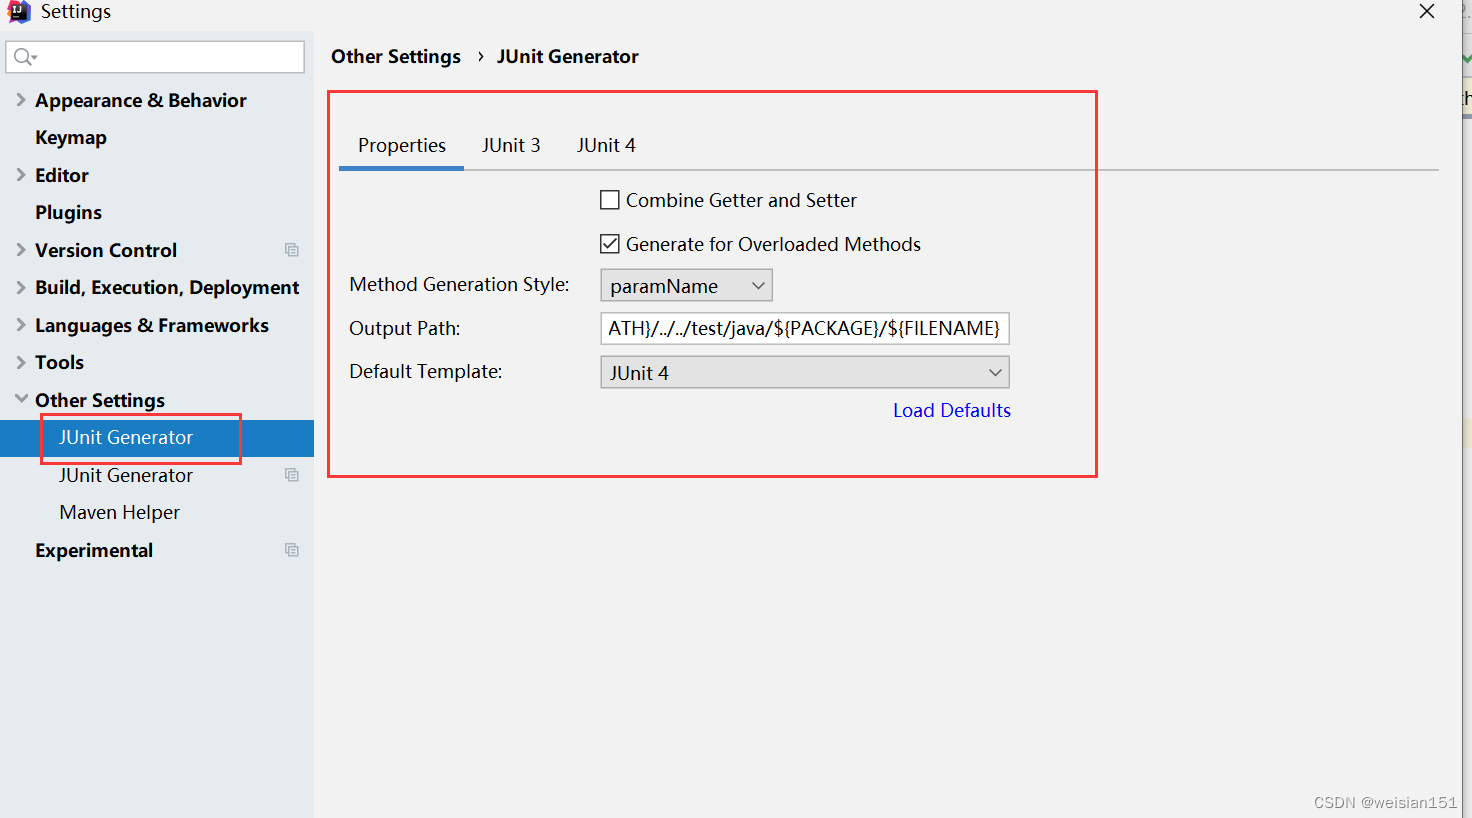
在idea环境下,可以用过插件的方式自动生成juint模板代码。不过具体要需要自己手动编写。 1、安装插件 打开idea,file–settings–plugins,搜索和安装插件(JunitGenerator V2.0和JUnit),安装后,后面的两个勾选都必须选中。 我仅安装JunitGenerator V2.0插件,安装成功后发现两个都存在了。JunitGenerator V2.0为代码生成必要的,JUnit为运行juint单元测试必要的。 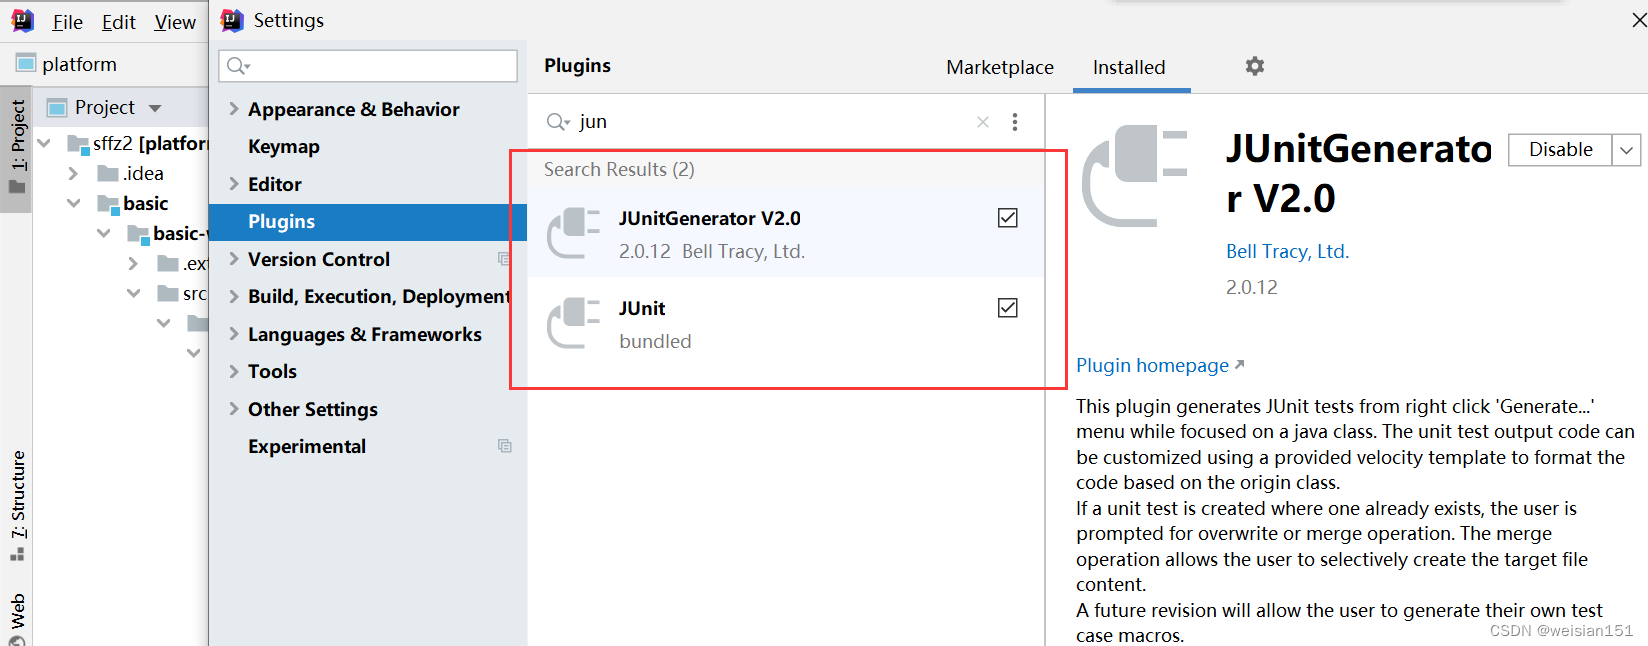 2、配置junit 安装完成插件后,需要重启idea。之后打开settings–other settings,可以看到如下的插件配置页面 (1)、完成如下图的配置 Output Path配置为: 2、配置junit 安装完成插件后,需要重启idea。之后打开settings–other settings,可以看到如下的插件配置页面 (1)、完成如下图的配置 Output Path配置为:
${SOURCEPATH}/../../test/java/${PACKAGE}/${FILENAME}
 (2)、切换到juint4模板页面,进行如下修改 (2)、切换到juint4模板页面,进行如下修改  附完整我的junit4模板配置 附完整我的junit4模板配置
########################################################################################
##
## Available variables:
## $entryListhodList - List of method composites
## $entryList.privateMethodList - List of private method composites
## $entryList.fieldList - ArrayList of class scope field names
## $entryList.className - class name
## $entryList.packageName - package name
## $today - Todays date in MM/dd/yyyy format
##
## MethodComposite variables:
## $method.name - Method Name
## $method.signature - Full method signature in String form
## $method.reflectionCode - list of strings representing commented out reflection code to access method (Private Methods)
## $method.paramNames - List of Strings representing the method's parameters' names
## $method.paramClasses - List of Strings representing the method's parameters' classes
##
## You can configure the output class name using "testClass" variable below.
## Here are some examples:
## Test${entry.ClassName} - will produce TestSomeClass
## ${entry.className}Test - will produce SomeClassTest
##
########################################################################################
##
#macro (cap $strIn)$strIn.valueOf($strIn.charAt(0)).toUpperCase()$strIn.substring(1)#end
## Iterate through the list and generate testcase for every entry.
#foreach ($entry in $entryList)
#set( $testClass="${entry.className}Test")
##
package $entry.packageName;
import org.junit.Test;
import org.junit.Before;
import org.junit.After;
import org.junit.runner.RunWith;
import org.springframework.boot.test.context.SpringBootTest;
import org.springframework.test.context.junit4.SpringRunner;
/**
* ${entry.className} Tester.
*
* @author
* @since $today
* @version 1.0
*/
@RunWith(SpringRunner.class)
@SpringBootTest(classes = {PlatformApplication.class}, webEnvironment = SpringBootTest.WebEnvironment.RANDOM_PORT)
public class $testClass {
@Before
public void before() throws Exception {
}
@After
public void after() throws Exception {
}
#foreach($method in $entry.methodList)
/**
*
* Method: $method.signature
*
*/
@Test
public void test#cap(${method.name})() throws Exception {
//TODO: Test goes here...
}
#end
#foreach($method in $entry.privateMethodList)
/**
*
* Method: $method.signature
*
*/
@Test
public void test#cap(${method.name})() throws Exception {
//TODO: Test goes here...
#foreach($string in $method.reflectionCode)
$string
#end
}
#end
}
#end
3、代码引入junit的必要pom
org.springframework.boot
spring-boot-starter-test
test
junit
junit
4.12
test
4、生成需要的junitTest文件 打开需要生成测试的源文件,在页面上右键选择generate,选择junit Test,选择JUnit4 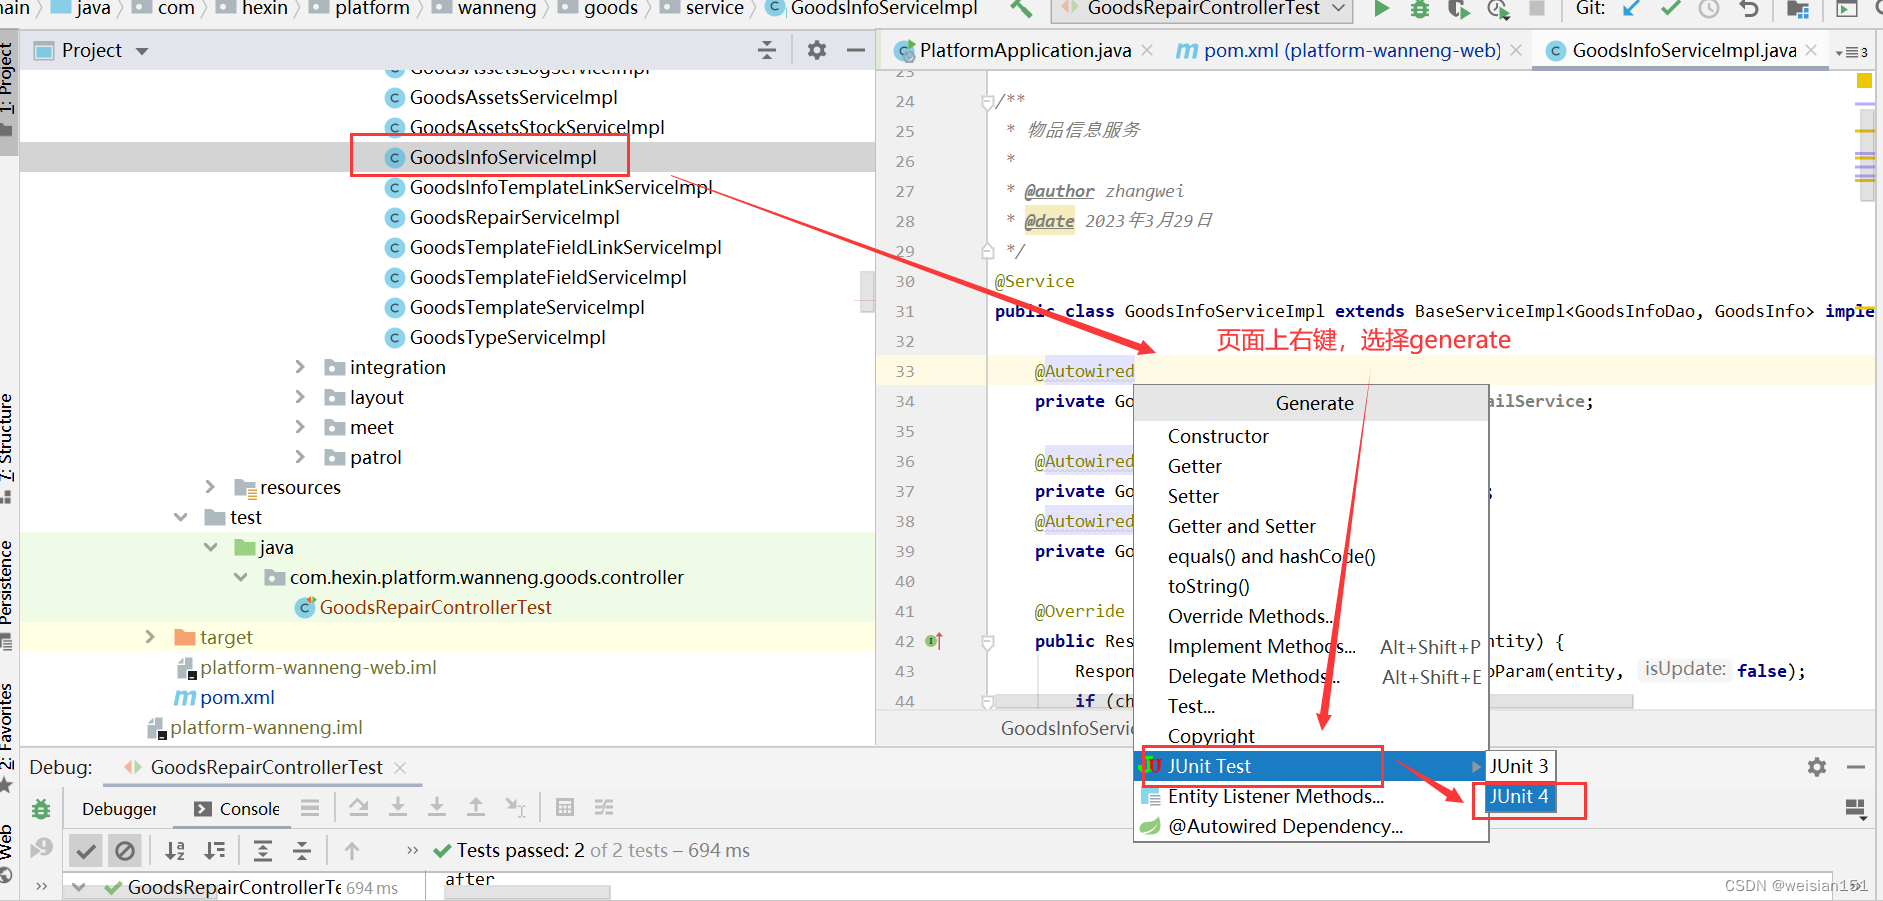 可以看到自动生成*Test.java文件,文件路径和源文件一致,仅挂载在test资源下 可以看到自动生成*Test.java文件,文件路径和源文件一致,仅挂载在test资源下 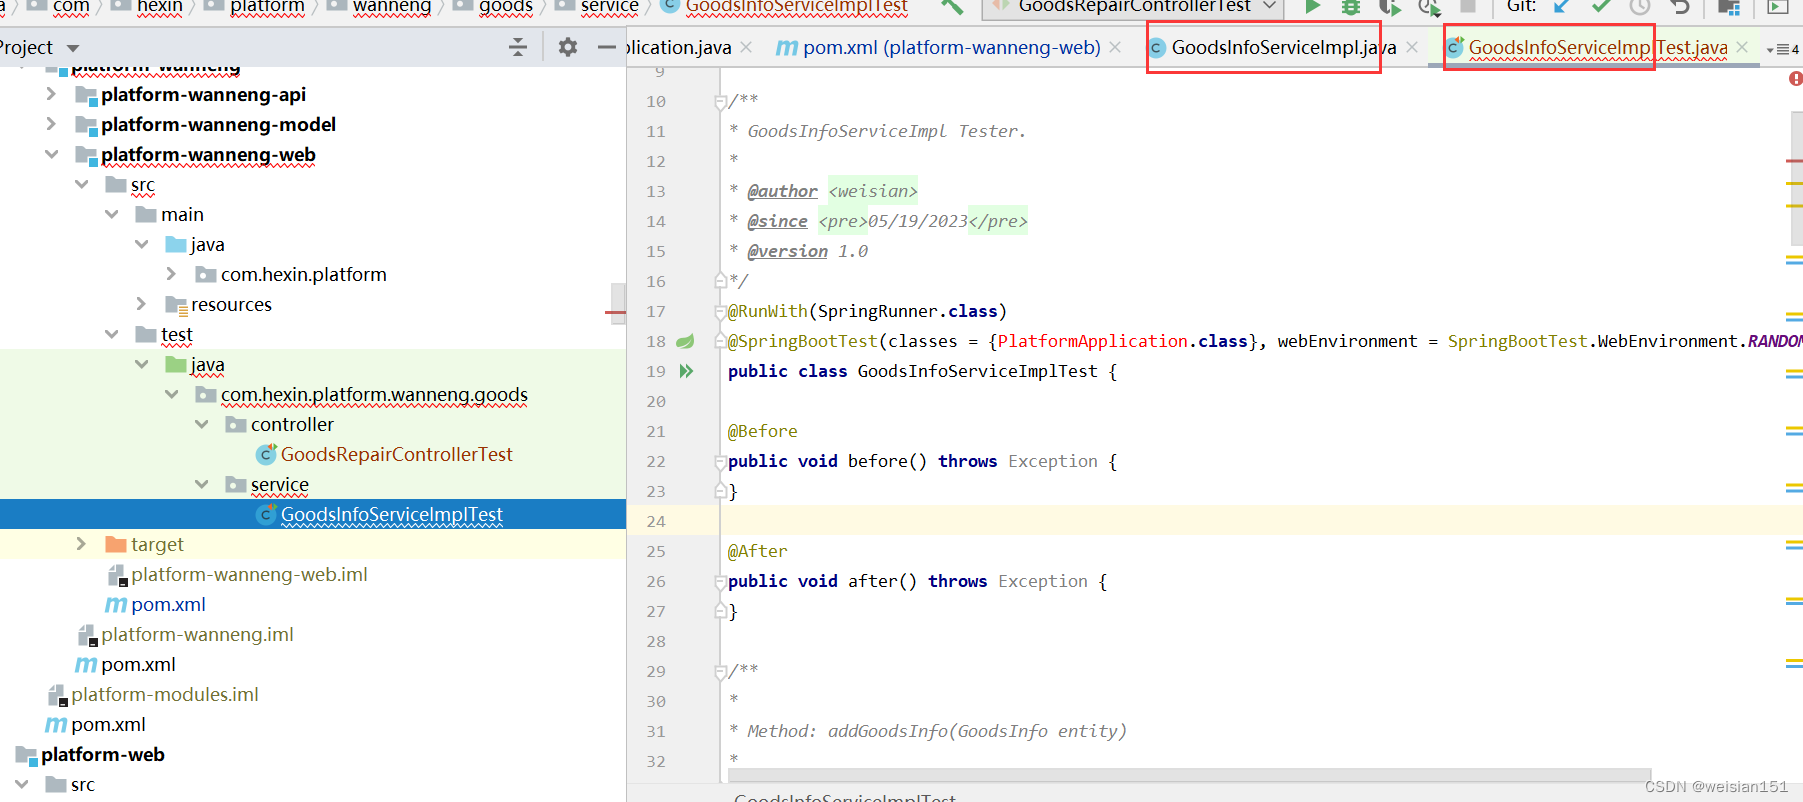 这里看到报错是因为启动类我们没有在junit 4模板中导入包,如果模板配置加上导入启动类包的代码,就不会报错。模板未配置的话,也可以自己手动导入包 这里看到报错是因为启动类我们没有在junit 4模板中导入包,如果模板配置加上导入启动类包的代码,就不会报错。模板未配置的话,也可以自己手动导入包
5、如果是第一次生成test目录的化,需要修改目录属性 (1)、在src目录上,右键按照下图配置成Sources Root 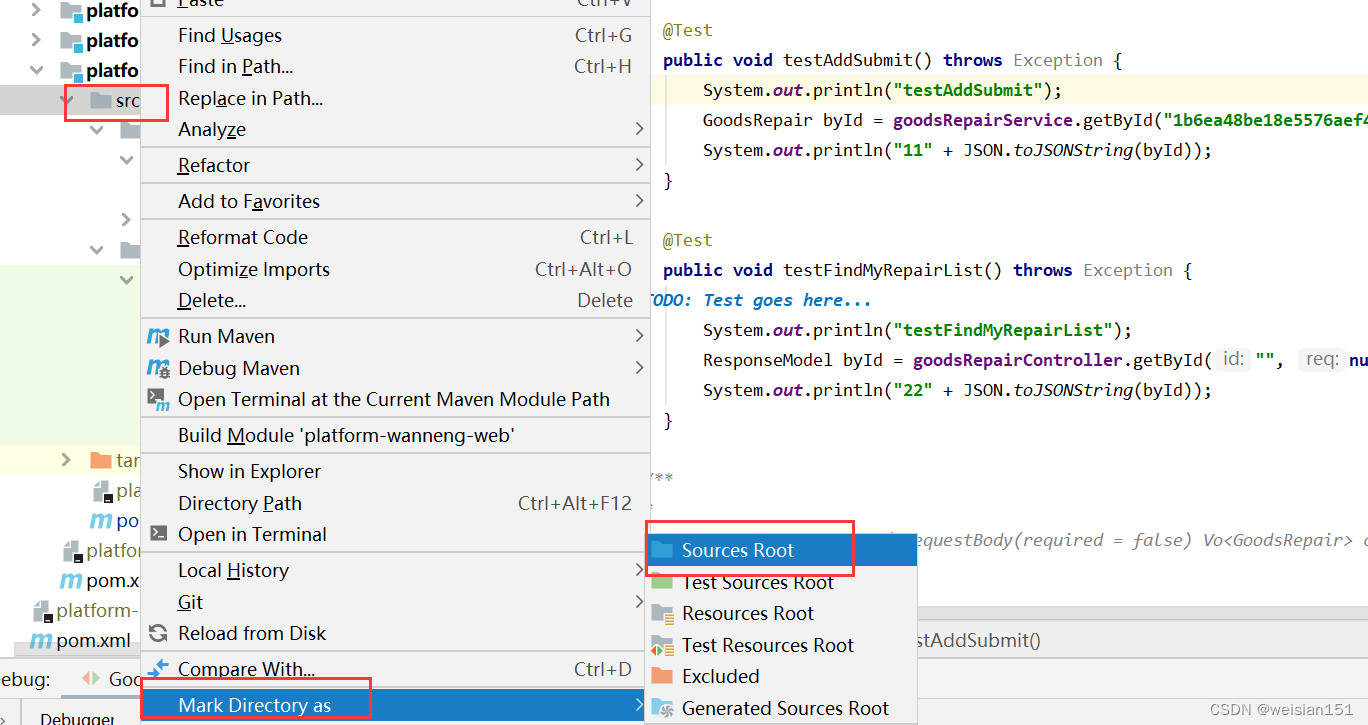 (2)、在test目录上,右键按照下图配置成Test Sources Root (2)、在test目录上,右键按照下图配置成Test Sources Root 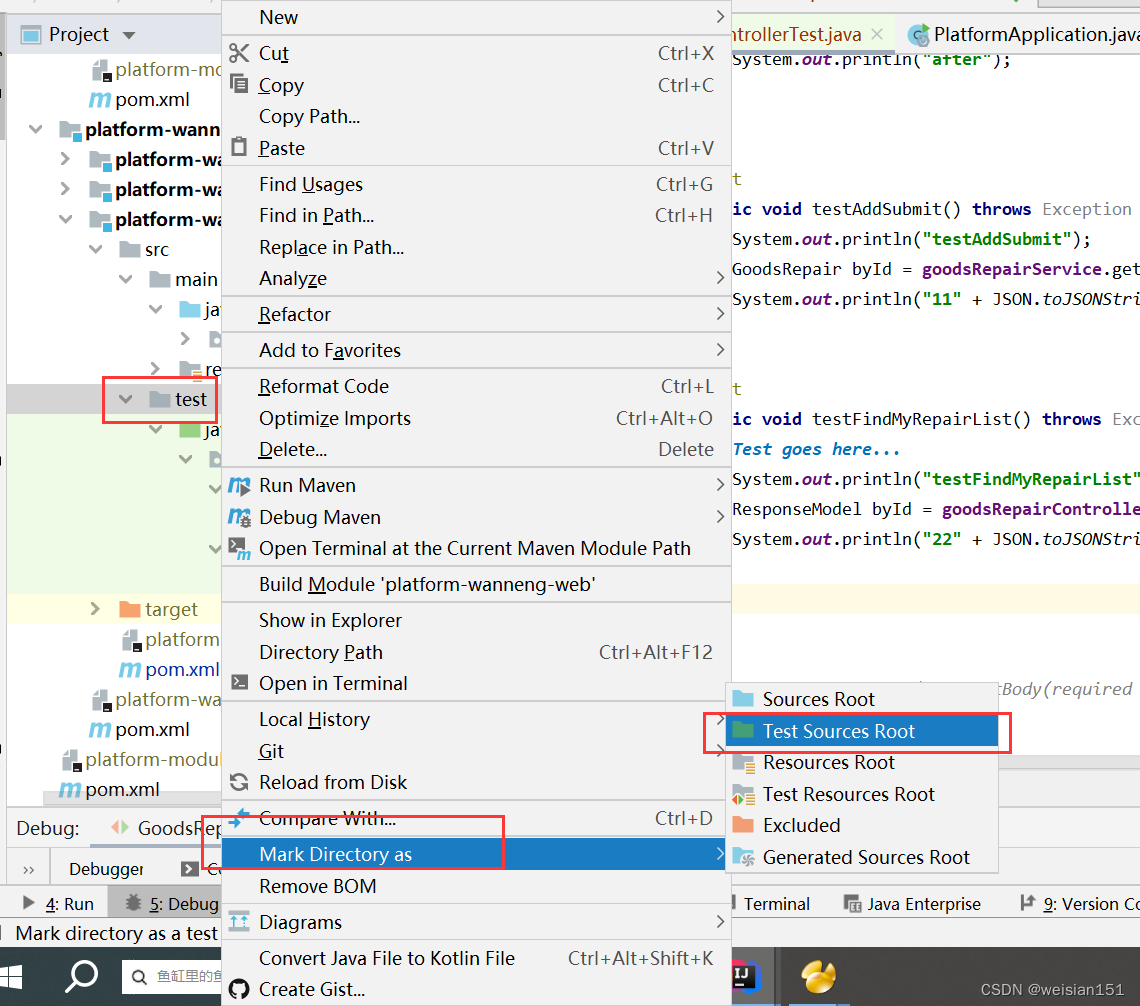 6、模板生成的会是源代码中所有定义方法的测试方法,都为空,可以自己调整代码进行数据模拟测试。 一次启动会运行所有的测试方法,每一个测试方法都会先执行一下before,执行完成之后在执行一次after。 如下实例: 6、模板生成的会是源代码中所有定义方法的测试方法,都为空,可以自己调整代码进行数据模拟测试。 一次启动会运行所有的测试方法,每一个测试方法都会先执行一下before,执行完成之后在执行一次after。 如下实例:
package XX.goods.controller;
import com.alibaba.fastjson.JSON;
import com.XX.PlatformApplication;
import com.XX.model.ResponseModel;
import com.XX.goods.api.GoodsRepairService;
import com.XX.goods.model.GoodsRepair;
import org.junit.After;
import org.junit.Before;
import org.junit.Test;
import org.junit.runner.RunWith;
import org.springframework.boot.test.context.SpringBootTest;
import org.springframework.test.context.junit4.SpringRunner;
import org.springframework.beans.factory.annotation.Autowired;
/**
* GoodsRepairController Tester.
*
* @author
* @version 1.0
* @since 05/19/2023
*/
@RunWith(SpringRunner.class)
@SpringBootTest(classes = {PlatformApplication.class}, webEnvironment = SpringBootTest.WebEnvironment.RANDOM_PORT)
public class GoodsRepairControllerTest {
@Autowired
private GoodsRepairService goodsRepairService;
@Autowired
private GoodsRepairController goodsRepairController;
@Before
public void before() throws Exception {
System.out.println("before");
}
@After
public void after() throws Exception {
System.out.println("after");
}
@Test
public void testAddSubmit() throws Exception {
System.out.println("testAddSubmit");
GoodsRepair byId = goodsRepairService.getById("1b6ea48be18e5576aef49f8f60653888");
System.out.println("11" + JSON.toJSONString(byId));
}
@Test
public void testFindMyRepairList() throws Exception {
System.out.println("testFindMyRepairList");
ResponseModel byId = goodsRepairController.getById("", null, null);
System.out.println("22" + JSON.toJSONString(byId));
}
}
7、右键执行单元测试类查看效果 执行: 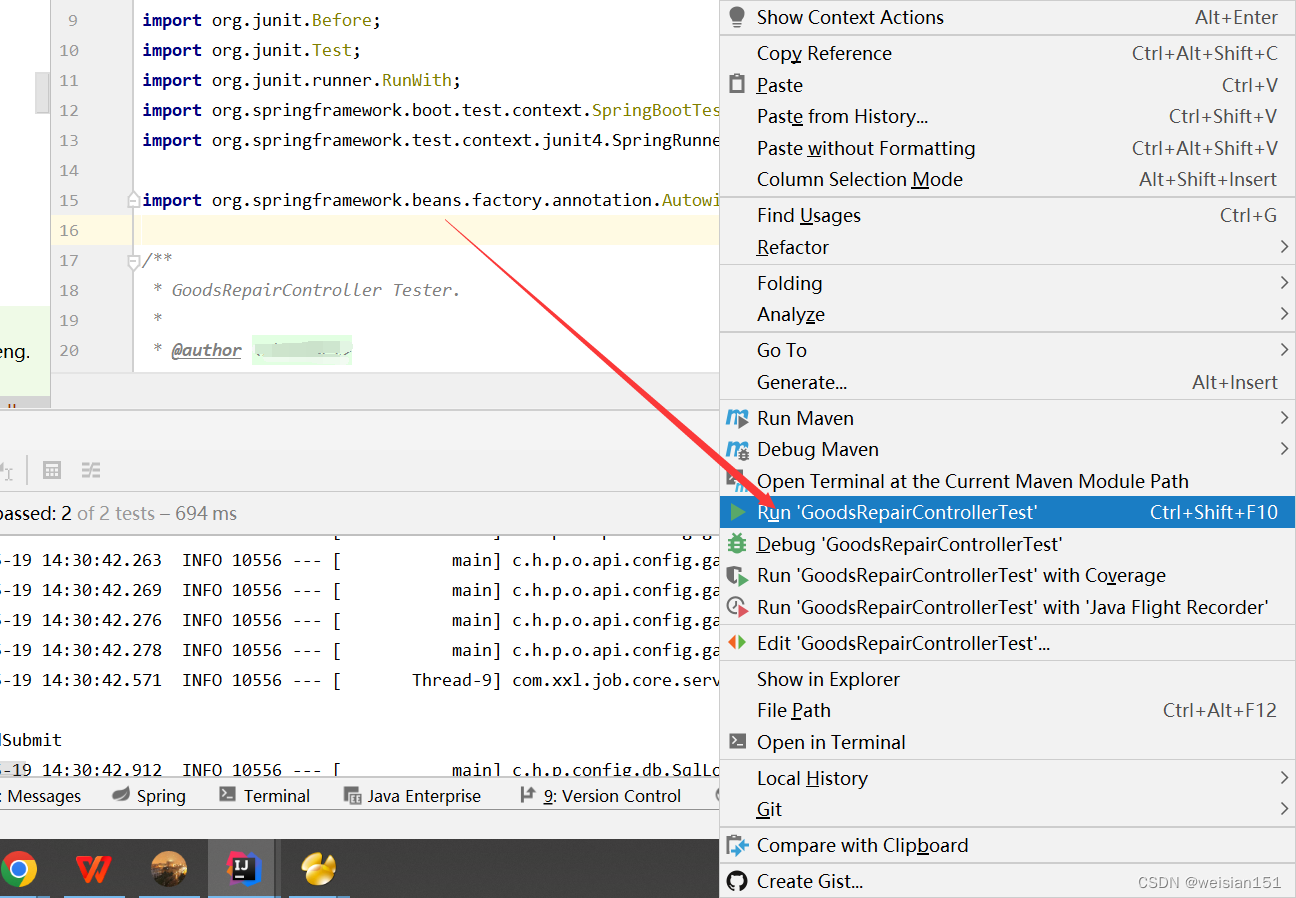 效果: 效果: 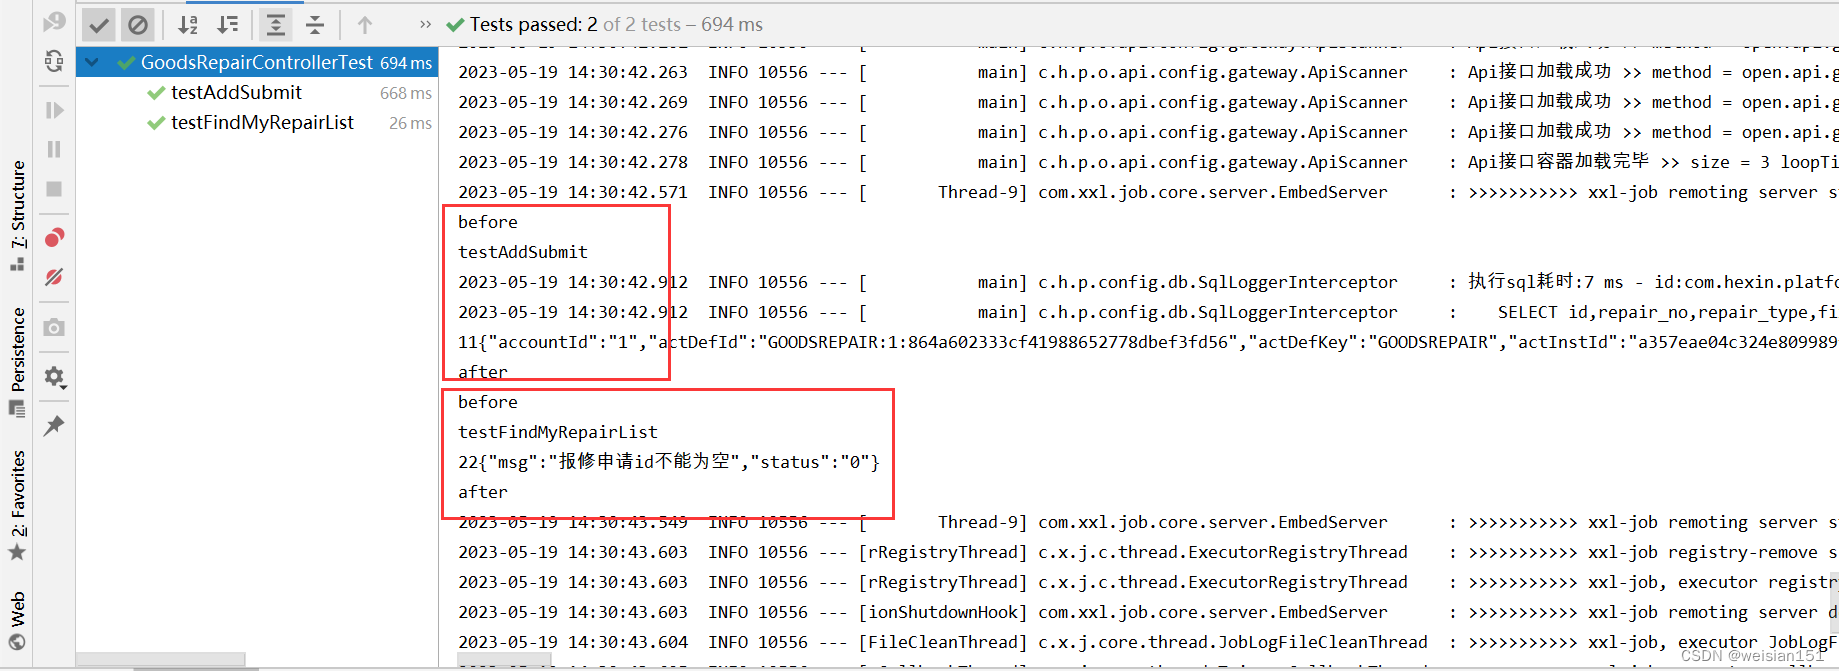 上图是全部的日志,也可以点击单个方法查看单个方法的运行日志: 上图是全部的日志,也可以点击单个方法查看单个方法的运行日志: 
总结: idea下需要先安装好插件,重启idea后,配置模板,修改源代码pom后,指定源代码文件生成对应的test工具类,如果是第一次生成,需要修改目录属性。之后就可以根据我们需要编写测试代码了。 运行juint工具类,实际上相当于启动容器后,在调用指定类的所有测试方法。关于注入service时,一定要是@Autowired从容器中获取,不然在before中new serviceImpl,只能引用成功service本身的方法,如果service还引用其他service,就无法满足。
学海无涯苦作舟!!!
|